Open Charter Trips
Open Charter Trips
Charter Events are Events where boats are entirely booked by one booking. Let us assume that person A has booked a charter for his 7 friends. The booking will be made in one name and the tickets will be of his 7 friends.
Charter trips are suitable for private family trips, business meetings, and celebration events.
How to create a Charter Event?
The system allows you to create Charter Events by two ways.
- You can either create a Charter Event from scratch or
- You can convert a vacant Open Party event into a charter trip.
Both of them work equally well, the only difference is that by conversion method; you can book a vacant open party trip into a charter trip.
How to Convert Current Events into Charter Events?
Login to your Reservation dashboard and scroll down to Current Events to see the latest events. Upon clicking; you will see a screen like this –
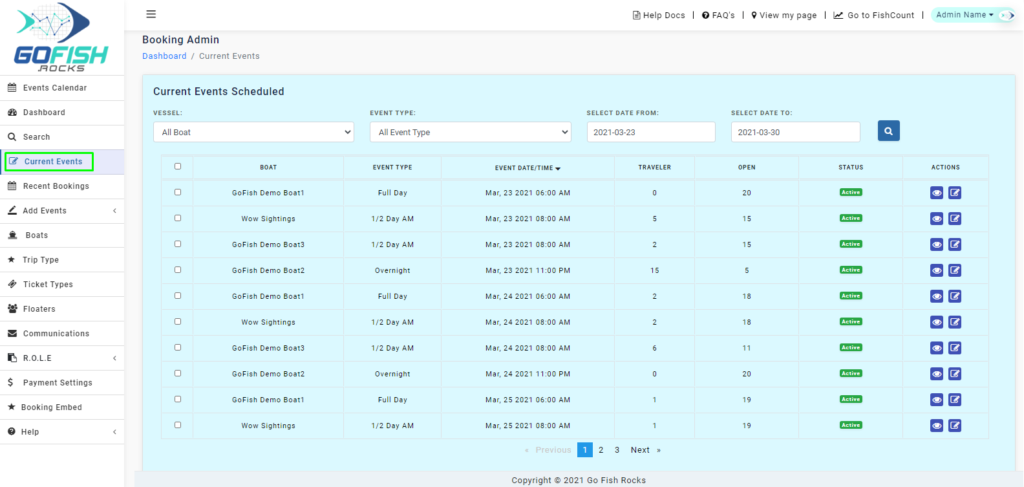
As you can see in the screenshot; most of the boats have one or more travelers booked for their respective trips except GoFish Demo Boat 2.
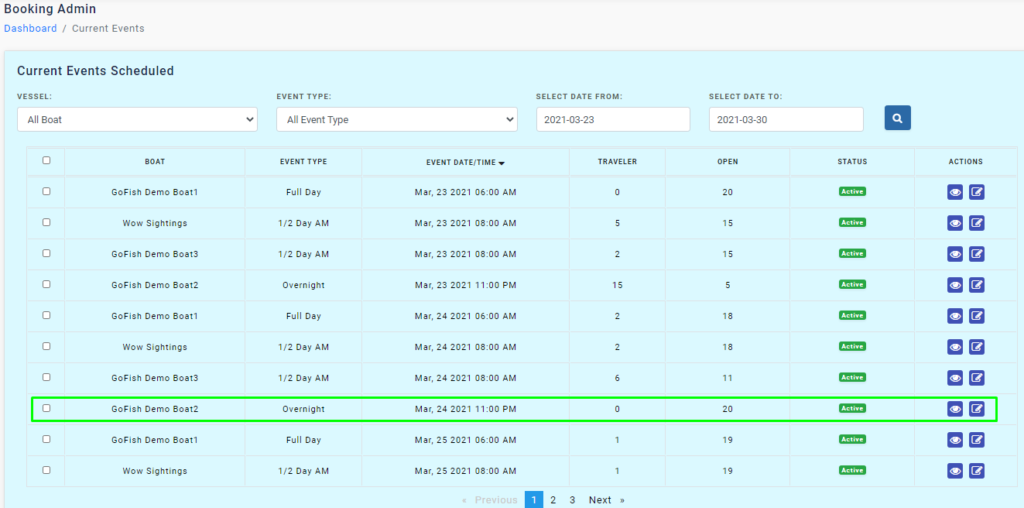
Since this boat does not have any traveler yet; you can convert it as a Charter Event and take bookings for it. Here are the other details shown on this screen –
- Boat – Boat names
- Event Type – Type of events these boats run for.
- Event Date/Time – Date and time of the event.
- Travelers – Number of travelers booked.
- Open – The vacant number of seats.
- Status – It tells whether the event is active or inactive.
- Actions – It gives you options to view the event and also edit it.
Step 1 - Create Charter
Click on the checkbox of your desired boat with no travelers and click on ‘Create Charter’. As you do so; you’re required to click on Create Charter.

Upon clicking, Enter the following details –
Charter Master –
Charter Master refers to the basic information of your passengers.
- First Name
- Last Name
- Address
- City
- State
- ZIP Code
- Email Id
- Phone

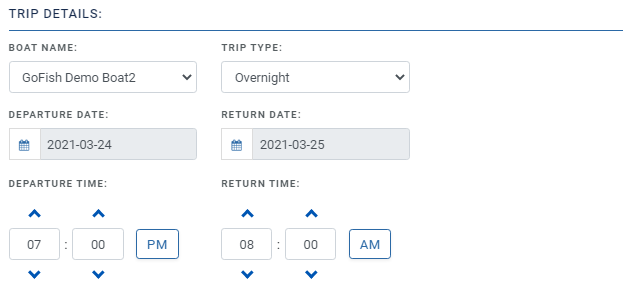
Trip Details
Trip details include the basic information related to your trip.
- Boat Name
- Trip Type (Example: Overnight, Full Day, 2 Days, etc)
- Departure Date
- Return Date
- Departure Time
- Return Time
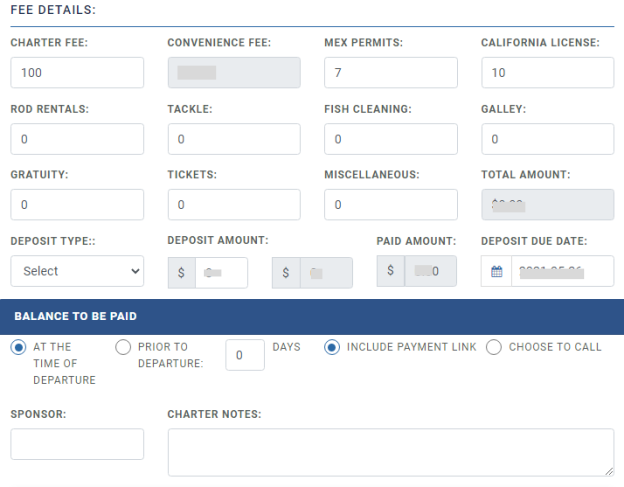
Fee Details:
Here you’ll see all the fields related to your payments.
- Charter Fee
- Convenience Fee
- Mex Permits
- California License
- Rod Rentals
- Tackle
- Fish Cleaning
- Galley
- Gratuity
- Tickets
- Miscellaneous
- Pay
- Total Amount
- Deposit Due Date
- Sponsor
- Charter Notes
Payment Details
- Payment Amount
- Credit Card Details
- Expires
- CVV Code
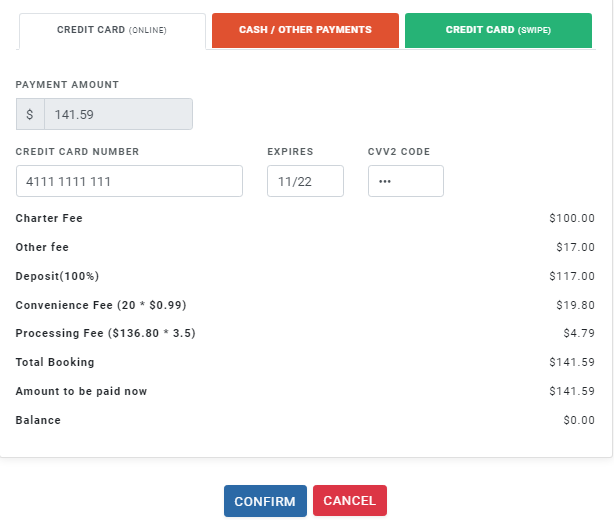
If the passenger’s booking is after 30 days from today’s date, he can opt to pay 50% now and the remaining amount later. The feature is not available if the booking is within the next 30 days.
Click on ‘Confirm’ and process the payment from your customer and once your payment is received, the charter will be booked for that date.
How to create Charter Events from scratch?
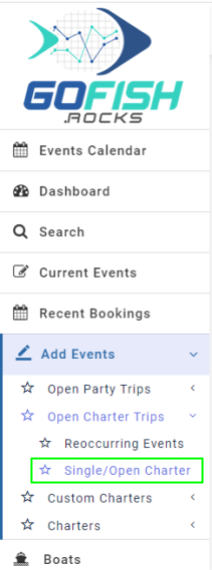
Step 1 - Click on Open Charter Trips
Login to your Reservation system and click on ‘Open Charter Trips’ under the ‘Add Events’ section.
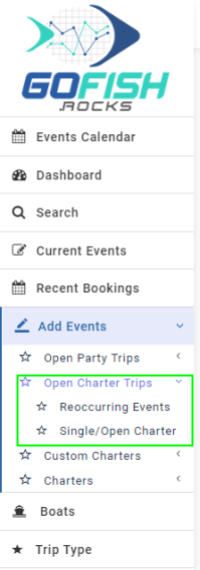
Similar to the Open Party Events; you can create two types of Charter Events namely –
- Reoccurring Events – Trips that run on a regular basis (weekly, monthly) can be scheduled from Reoccurring Events.
- Single/Open Charter – Trips that are one time events and are not planned to run anytime in the future are booked from Single/Open Charters.

How to create Reoccurring Events (Charters)
Step 1. Click on Reoccurring Events under Add Events
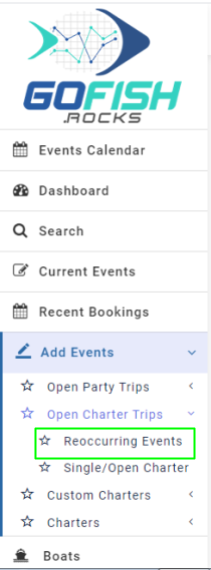
Fill in the details –
Trip Details –
- Trip details include the basic information related to your trip.
- Boat Name – Enter boat name
- Trip Type – Enter trip type
- Boat Capacity – Enter boat capacity
- Scheduled Event for – Enter start date
- Scheduled Event to – Enter end date
- Trip start time – Enter start time
- Scheduled Event days – Since the trip is of reoccurring in nature; you’re required to select days on which the trips will go. (Sunday, Monday, Tuesday, Wednesday, Thursday, Friday, Saturday)
- Trip duration – Enter trip duration
- Initial Online Status – Offline trips are not available for public users to book directly. Only the admin can make a booking on offline events through the back end.
- Online cutoff time – This feature allows you to make your event go offline for more bookings right before your departure/ event start time.
Fee Details
Here you’ll see all the Fee details. Fill in all the details correctly –
- Total amount – Enter total charter fee
- Deposit type – You can allow your customers to pay partially at the time of booking and the rest of the amount you can charge later. You can take it as a flat rate (in US Dollars or in percentage.
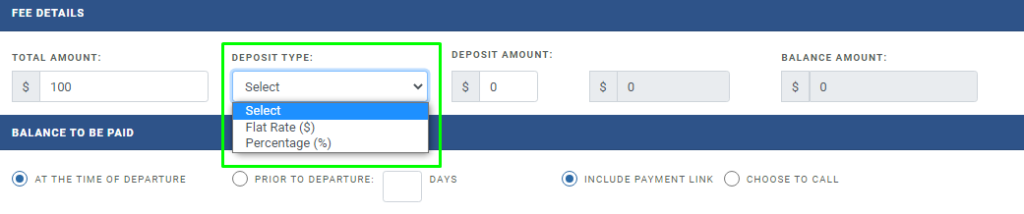
- Deposit amount – You’re required to enter the amount deposited by the customer here.
- Balance Amount – Enter the balance amount here.

Balance treatment
These options are for the treatment of the balance due upon the customer.
- At the time of departure – Select this if your customer wants to pay the balance at the time of departure.
- Prior to departure – Select this if your customer wants to pay the balance prior to departure. Enter the number of days prior to departure the customers want to pay the balance. Suppose a customer wants to pay the balance 3 days prior to departure. You can select the ‘Prior to departure’ option and type 3 in the box provided.

- Include payment link – If you choose this option; the system will send an email to the customer with the payment link in the email. The customer can process that payment from that link itself.
- Choose to call – With this option; the email will ask the customer to call you directly.
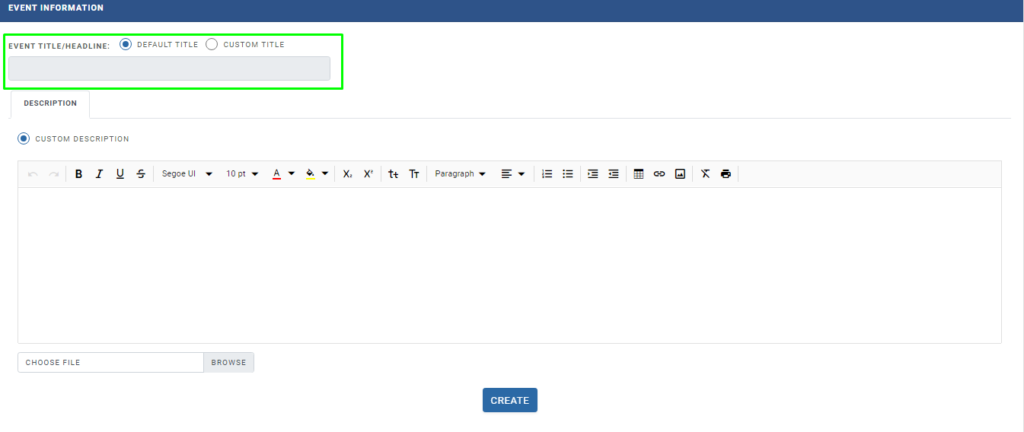
Event Information
Event Title/Headline
Here you’re required to enter Event Title/Headline for your event. You can choose to select among the default titles or can create a custom of your choice.

Description
Enter a description of your event explaining all the necessary information for your customers
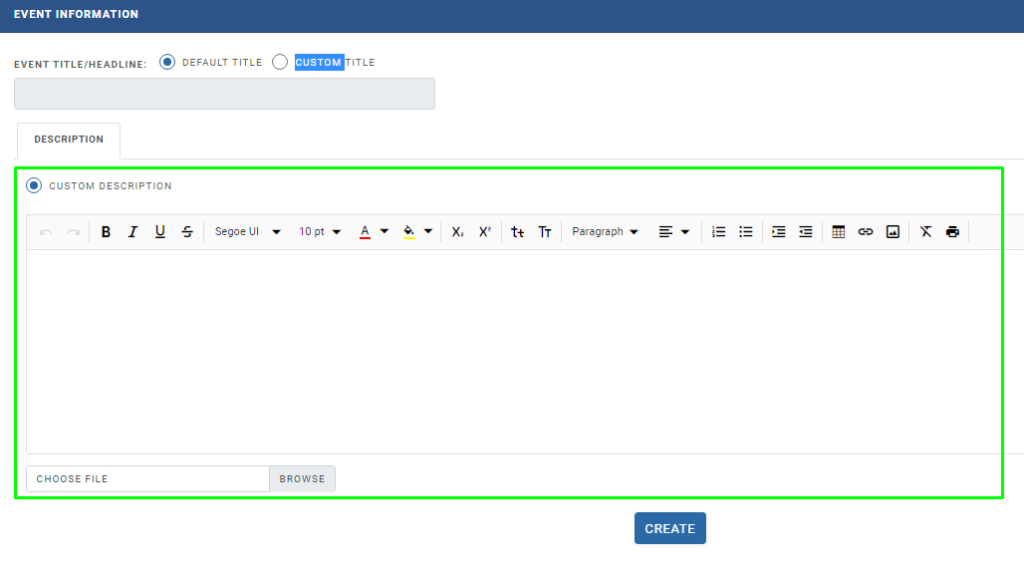
Click on ‘Create’ and your event will be created successfully.
How to create Single/Open Charter
Step 1. Click on Single/Open Charter
Step 2 - Fill in the following details -
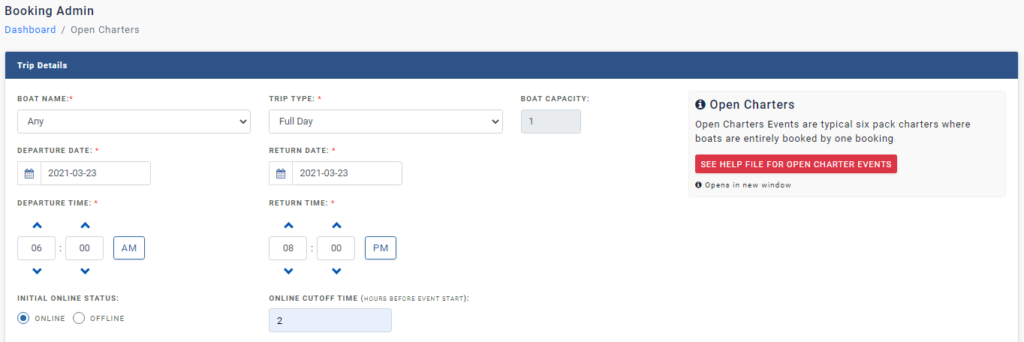
Trip Details –
Trip details include the basic information related to your trip.
- Boat Name – Enter boat name
- Trip Type – Enter trip type
- Boat Capacity – Enter boat capacity
- Departure Date – Enter start date
- Return Date – Enter end date
- Departure Time – Enter start time
- Return time – Enter return time
- Initial Online Status – Offline trips are not available for public users to book directly. Only the admin can make a booking on offline events through the back end.
- Online cutoff time – This feature allows you to make your event go offline for more bookings right before your departure/ event start time.
Fee Details
Here you’ll see all the Fee details. Fill in all the details correctly –
- Total amount – Enter total charter fee
- Deposit type – You can allow your customers to pay partially at the time of booking and the rest of the amount you can charge later. You can take it as a flat rate (in US Dollars or in percentage.

- Deposit amount – You’re required to enter the amount deposited by the customer here.
- Balance Amount – Enter the balance amount here.

Balance treatment
These options are for the treatment of the balance due upon the customer.
- At the time of departure – Select this if your customer wants to pay the balance at the time of departure.
- Prior to departure – Select this if your customer wants to pay the balance prior to departure. Enter the number of days prior to departure the customers want to pay the balance. Suppose a customer wants to pay the balance 3 days prior to departure. You can select the ‘Prior to departure’ option and type 3 in the box provided.

- Include payment link – If you choose this option; the system will send an email to the customer with the payment link in the email. The customer can process that payment from that link itself.
- Choose to call – With this option; the email will ask the customer to call you directly.
Event Information
Event Title/Headline
Here you’re required to enter Event Title/Headline for your event. You can choose to select among the default titles or can create a custom of your choice.
Description
Enter a description of your event explaining all the necessary information for your customers