How to create Reoccurring Events (Charters)
Events
- How to Edit Events
- How to Cancel an Event?
- What are Open Party Trips
- What are Reoccurring Events
- How to Block and Unblock Events
- What are Single/Open Events
- How to Delete an Event
- What are Open Charter Trips
- How to create a Charter Event?
- How to Convert a Vacant Open Party Event into a Charter Event?
- How to create a Custom Charter booking for your customer?
- How to create Charter Events from scratch?
- What are Custom Charters
- How to create a Standard Charter trip?
- How to create Reoccurring Charter Events
- What are Standard Charters
- How to create Single/Open Charter
How to create Reoccurring Charters Events
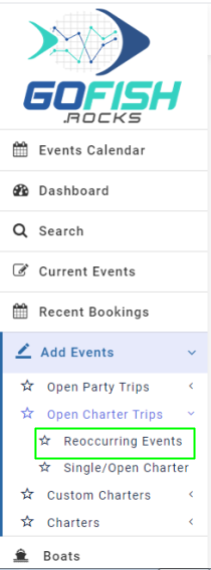
Step 1. Click on Reoccurring Events under Add Events
Get into the dashboard and click on Reoccurring Events under Add Events.
Step 2. Fill in the details
Trip Details – Trip details include the basic information related to your trip.
- Boat Name – Enter boat name
- Trip Type – Enter trip type
- Boat Capacity – Enter boat capacity
- Scheduled Event for – Enter start date
- Scheduled Event to – Enter end date
- Trip start time – Enter start time
- Scheduled Event days – Since the trip is of reoccurring in nature; you’re required to select days on which the trips will go. (Sunday, Monday, Tuesday, Wednesday, Thursday, Friday, Saturday)
- Trip duration – Enter trip duration
- Initial Online Status – Offline trips are not available for public users to book directly. Only the admin can make a booking on offline events through the back end.
- Online cutoff time – This feature allows you to make your event go offline for more bookings right before your departure/ event start time.
Fee Details – Here you’ll see all the Fee details. Fill in all the details correctly
- Total amount – Enter total charter fee
- Deposit type – You can allow your customers to pay partially at the time of booking and the rest of the amount you can charge later. You can take it as a flat rate in US Dollars or in percentage.
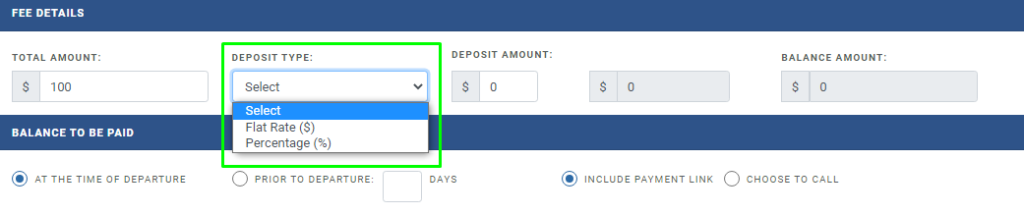
- Deposit amount – You’re required to enter the amount deposited by the customer here.
- Balance Amount – Enter the balance amount here.

Balance treatment – These options are for the treatment of the balance due upon the customer.
- At the time of departure – Select this if your customer wants to pay the balance at the time of departure.
- Prior to departure – Select this if your customer wants to pay the balance prior to departure. Enter the number of days prior to departure the customers want to pay the balance. Suppose a customer wants to pay the balance 3 days prior to departure. You can select the ‘Prior to departure’ option and type 3 in the box provided.

- Include payment link – If you choose this option; the system will send an email to the customer with the payment link in the email. The customer can process that payment from that link itself.
- Choose to call – With this option; the email will ask the customer to call you directly.
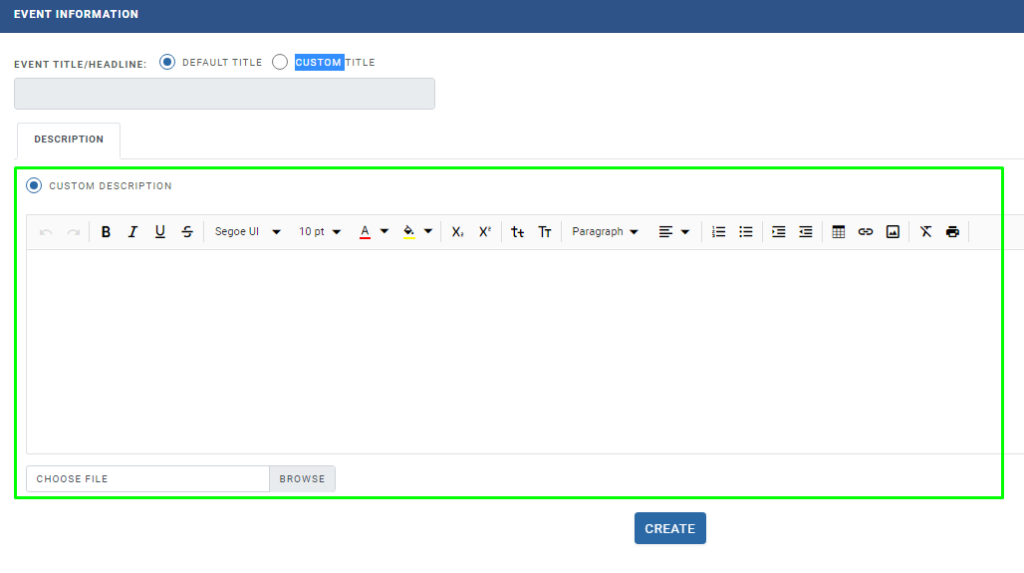
Event Information – Event Title/Headline
Here you’re required to enter Event Title/Headline for your event. You can choose to select among the default titles or can create a custom of your choice.
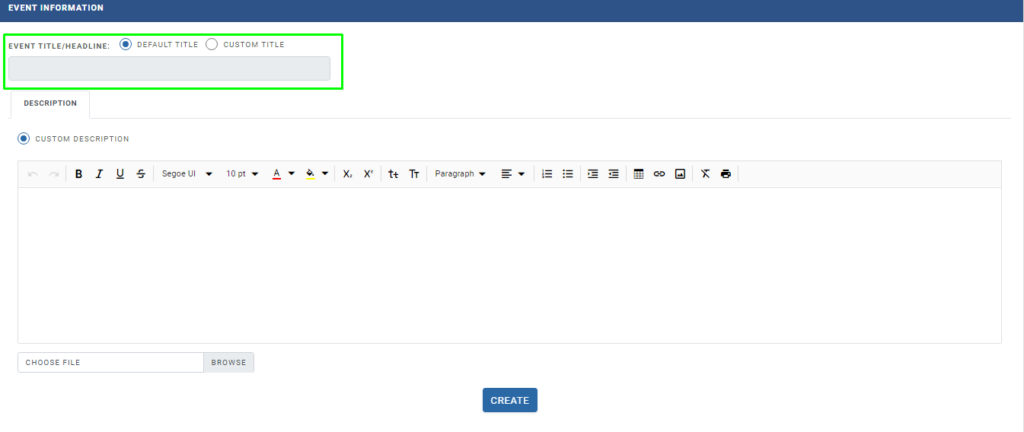
Description – Enter a description of your event explaining all the necessary information for your customers
Click on ‘Create’ and your event will be created successfully.
Events
- How to Edit Events
- How to Cancel an Event?
- What are Open Party Trips
- What are Reoccurring Events
- How to Block and Unblock Events
- What are Single/Open Events
- How to Delete an Event
- What are Open Charter Trips
- How to create a Charter Event?
- How to Convert a Vacant Open Party Event into a Charter Event?
- How to create a Custom Charter booking for your customer?
- How to create Charter Events from scratch?
- What are Custom Charters
- How to create a Standard Charter trip?
- How to create Reoccurring Charter Events
- What are Standard Charters
- How to create Single/Open Charter